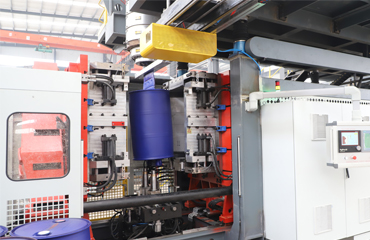
In the installation and debugging of the hollow blow molding machine, the debugging of the wall thickness controller is a very important part. Taking the MOOG wall thickness controller used by Juncon as an example, the editor will teach you how to debug MOOG in detail. The Accumulator and DCDT of the Wall Thickness Controller.
Hope to help everyone.
How to set up MOOG Wall Thickness Controller in Blow Molding Machine?

1. How to set the wall thickness controller Accumulator of the hollow blow molding machine MOOG
①First, install the large electronic ruler in a suitable position. And set the shot volume to 100% or directly enter the Accumulator interface.
②After the heating time and temperature are reached, turn on the extruder and start stocking. When material flows out of the die, close the die.

③When the piston of the die head rises to the top position, that is to say, after reaching the maximum stroke of the pressing cylinder, it proves that the storage material has reached the full cylinder. At this time, set the value of "Accumulator voltage" to "Full".
④Open the die, then press all the material out of the die and set the value of "Accumulator voltage" to "Empty".
In this way, the MOOG Accumulator is set up.
2. How to set the wall thickness controller DCDT of the hollow blow molding machine
①First, adjust the blow molding machine die to a suitable large opening, generally set at 25mm, and install the small electronic ruler in a suitable position.
②Turn on the servo oil pump, adjust the flow valve of the oil pump, and give a small flow first. Then adjust the pressure valve of the oil pump to adjust the initial pressure of the oil pump to 2~5 MPa.

③Open the MOOG wall thickness controller, enter the DCDT interface, and select Divergent mode.
④Slowly turn the knob counterclockwise, pay attention to the movement of the die while rotating, and stop rotating when the die is completely closed. And set the value of DCDT voltage to Zero.
⑤Then turn the knob clockwise to open the die opening to the maximum value, turn the knob until the valve current value returns to 0.0%, and then set the DCDT voltage value to Span.

⑥After completing the settings of zero and span, you can shock back to the main interface of DCDT, and set "Gain" in the main interface to 5.
⑦After all settings are completed, adjust the pressure of the private service oil pump to 10MPa and the flow to the maximum. You can use the wall thickness controller to adjust the thickness of the blank normally.
After the above two major operations, the MOOG wall thickness controller of the hollow blow molding machine is completely debugged.
If you have any questions when debugging the wall thickness controller, you are welcome to contact Juncon customer service, and the technical online guide will guide you to the solution.
September 12, 2022

July 25, 2022
please leave your message
Leave A Reply
Your email address will not be published. Required fiels are marked